How To Incubate Chicken Eggs At Home (Beginner-Friendly Guide)
Everything we’ve learned from years of hatching chicks — and how to set yourself up for success.
Whether you’re growing your flock or starting your first hatch, there’s something magical about watching life begin from a single egg. We've used both broody hens and incubators to hatch chickens and quail, and today I’m breaking down what’s worked best for us — and how to avoid the most common beginner mistakes when hatching chicken eggs. 🐣
🥚 Start With Strong, Fertile Eggs
The first step to a successful hatch starts before the eggs go in the incubator.
-
Collect eggs within 7 days of being laid (the fresher the better)
-
Store them pointy side down in a cool (but not cold) room — around 50–60°F is ideal
-
Don’t wash the eggs — this removes the natural bloom that protects them
-
Avoid cracked, misshapen, or overly dirty eggs
Pro tip: If you’re using shipped eggs (like from Meyer Hatchery), let them rest upright for 12–24 hours before setting. This helps air cells stabilize after transit.
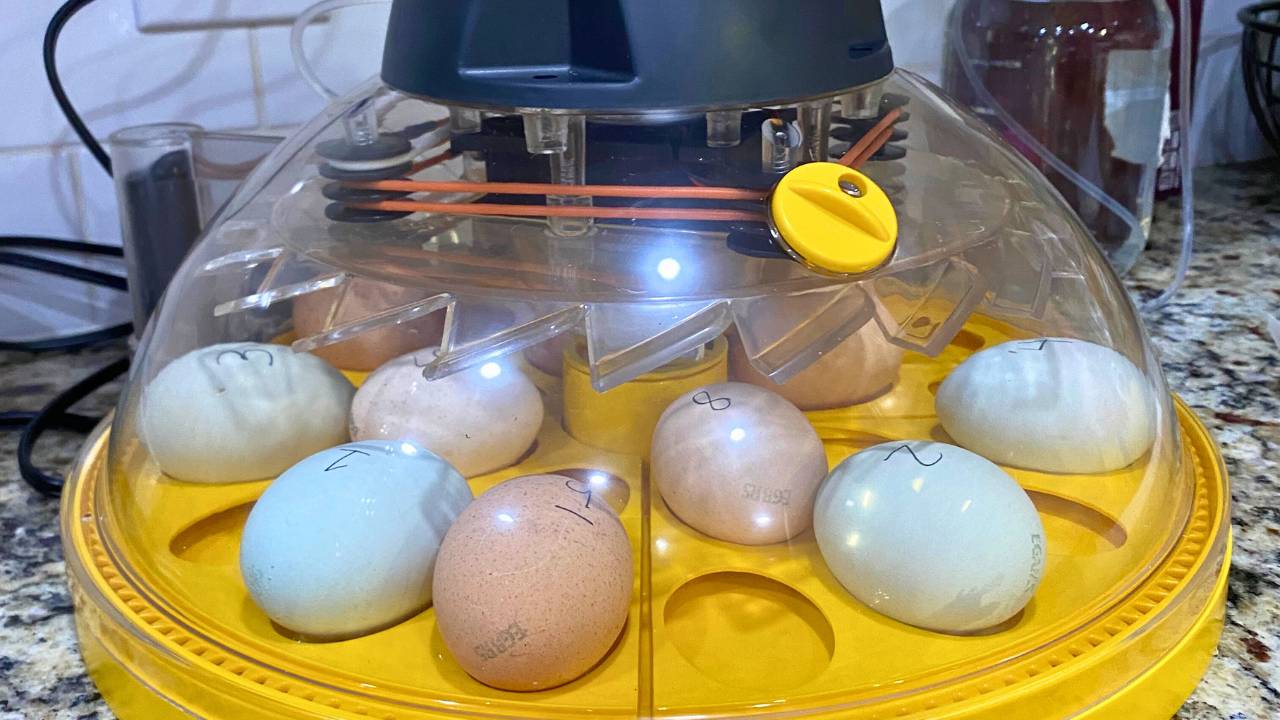
🌡️ Set Up Your Incubator Correctly
We personally use this model, and I highly recommend it. Why?
✔️ Automatic humidity control (no guessing!)
✔️ A clear lid to watch the whole process
✔️ Super easy to clean — which is key after hatch day
Here’s what to aim for:
-
99.5°F for a forced-air incubator
-
100.5°F if you’re using a still-air incubator (older style)
-
40–50% humidity for days 1–18
-
60–65% humidity for days 18–21 ("lockdown")
Always use a backup thermometer and hygrometer — incubator readings aren’t always perfectly accurate.
Curious about trying a dry hatch? Check out Meyer Hatchery’s post on dry incubation — a method that works especially well in humid climates.
🔄 Turning The Eggs
Eggs need to be turned several times a day to prevent the developing chick from sticking to the shell membrane. If you’re not using an automatic turner:
-
Turn eggs at least 3 times a day
-
Alternate the angle (left, right, center)
-
Stop turning at day 18 (aka “lockdown”)
Try to always turn them an odd number of times per day so they don’t rest in the same position overnight.
It's helpful to mark each egg with a pencil to monitor the eggs are being turned.
🔦 Candle At Day 7 (and Day 14)
Candling = shining a bright light through the egg to monitor development. You can try with any flashlight, but it is very helpful to have an inexpensive egg candler, especially for darker eggs (or quail eggs!).
At day 7 you should see:
-
A network of veins
-
A dark embryo blob moving inside
-
A visible air cell at the rounded end
By day 14, you’ll mostly see a dark mass and a larger air cell.
🚫 No development? Remove any eggs that are clear (light shines all the way through), leaking, have a visible red ring, or smell off — they can contaminate the others or even explode in the incubator.
🐣 Lockdown + Hatch Days
“Lockdown” starts at day 18 — this is when you:
-
Stop turning the eggs
-
Increase humidity to 60–65%
-
Resist the urge to open the incubator!
Around day 20–21, you’ll notice a tiny pip — a small crack in the shell. Then the chick begins to zip around the shell and break out completely.
🕰️ This process can take up to 24 hours — don’t panic if it seems slow.
Only assist a hatch if:
-
It’s been more than 24 hours since pipping with no progress
-
The membrane is clearly stuck and drying out
-
You’ve consulted a reliable guide (or someone experienced!)
🐥 Chick Development Timeline (Quick Glance)
-
Day 1–7: Organ and heart development
-
Day 8–14: Beak, feathers, and claws begin to form
-
Day 15–18: Chick positions for hatch
-
Day 19–21: Final growth + hatch
Understanding this timeline helps you know what’s going on inside that shell — and when not to interfere.
🧼 After Hatch: Clean Up + Brooder Time
Let your chicks fluff up completely before moving them to the brooder. This usually takes 8-24 hours. If they’re still damp or sleepy, wait a bit longer. Resist the urge to open the incubator too many times. The humidity can drop rapidly each time you open. This can lead to a chick becoming "shrink wrapped" in a shell.
Once the incubator is empty:
-
Discard eggshells + sanitize with a non-toxic cleaner
-
Let it air dry fully before storing
-
Prep for the next round (trust me, hatching is addictive)
🐓 What If It Didn’t Go As Planned?
Not every egg will hatch — and that’s okay. Sometimes it's shipping stress, inconsistent temperature, or just nature doing its thing.
I’ve found these two guides from Meyer Hatchery especially helpful for troubleshooting:
Final Thoughts
You don’t need a fancy setup to hatch eggs successfully — just a solid incubator, a little prep, and a willingness to learn as you go. Watching life start from a single egg never stops being magical.
If you’re curious what to do after the hatch, check out our chick care resources!
Happy hatching,
- Natalie
Cotton River Farm
Purchasing through these affiliate links helps support our blog at no cost to you. As an Amazon Associate, we earn from qualifying purchases. Thanks for supporting Cotton River Farm!